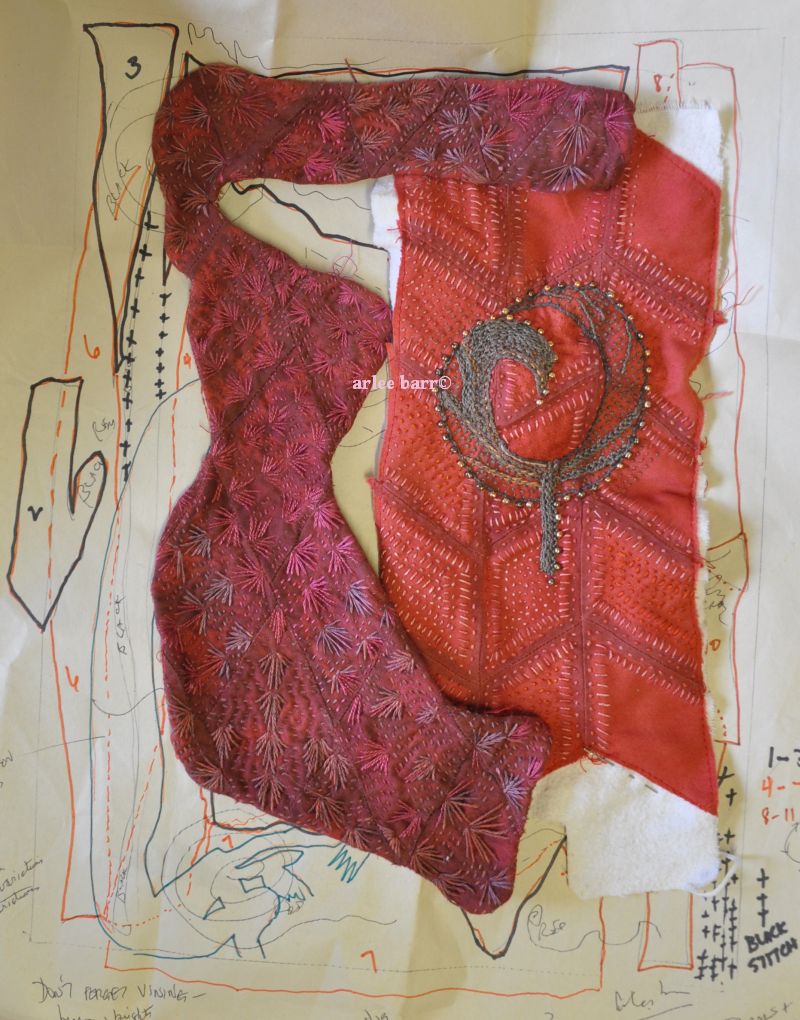
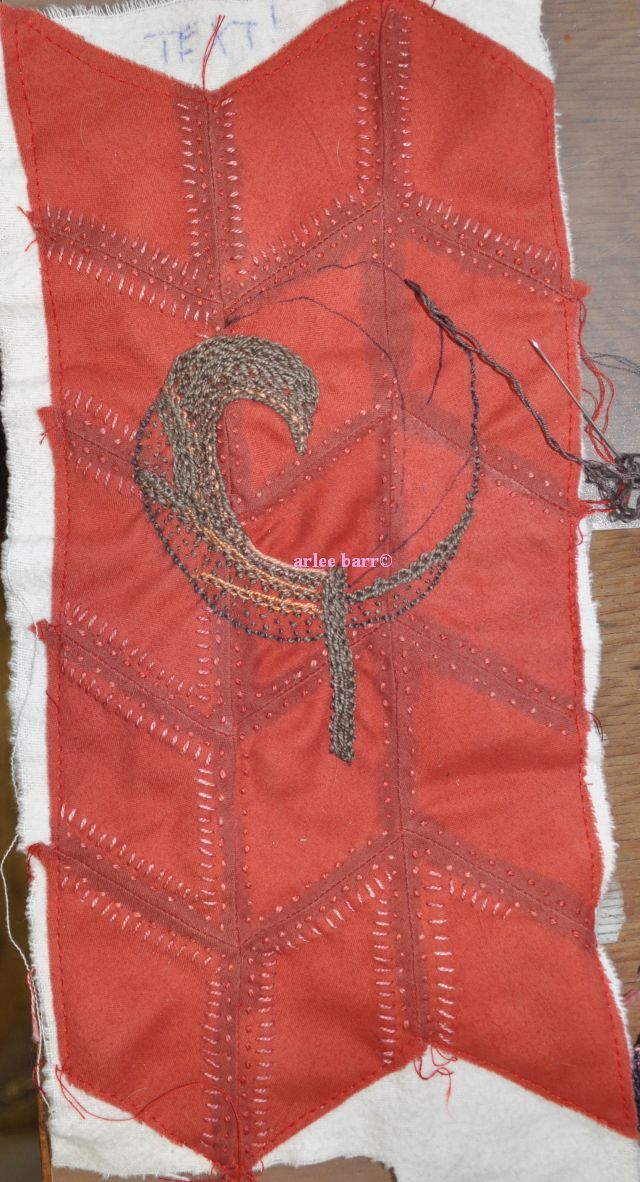
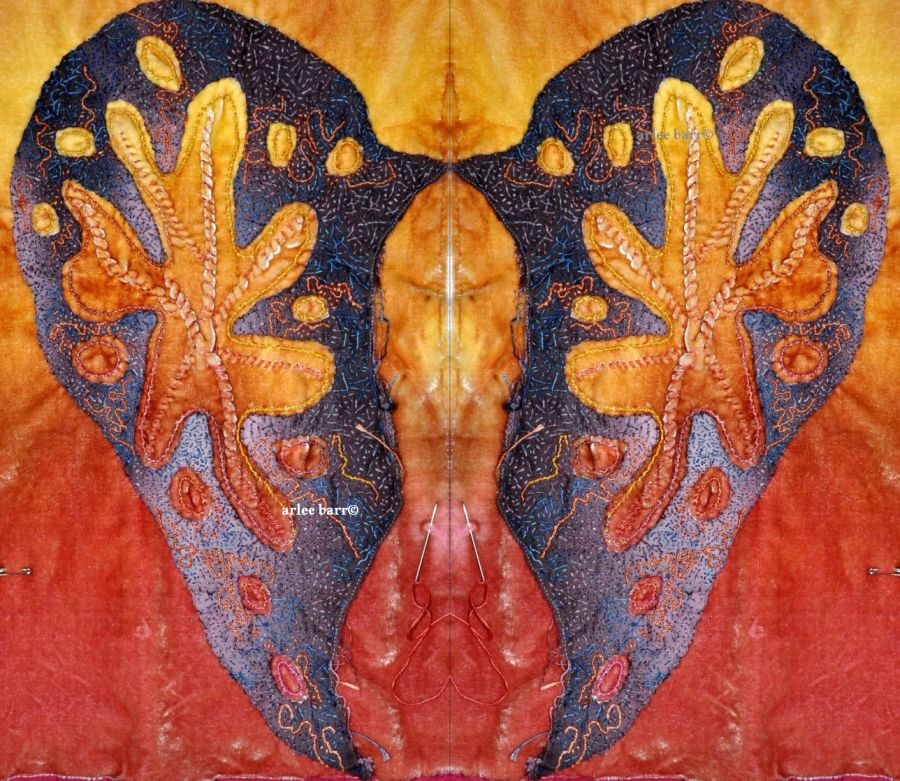
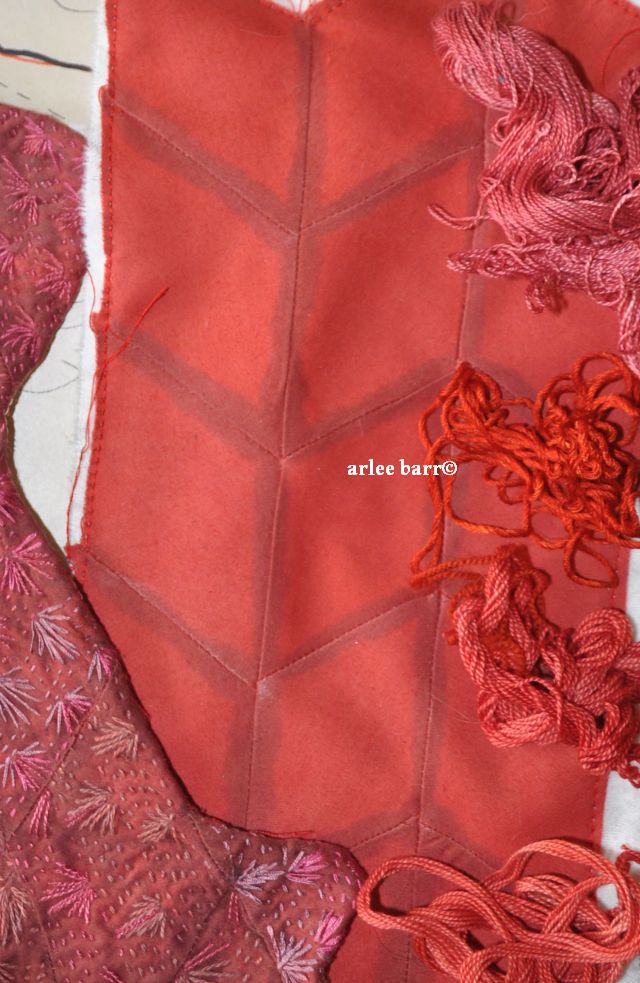
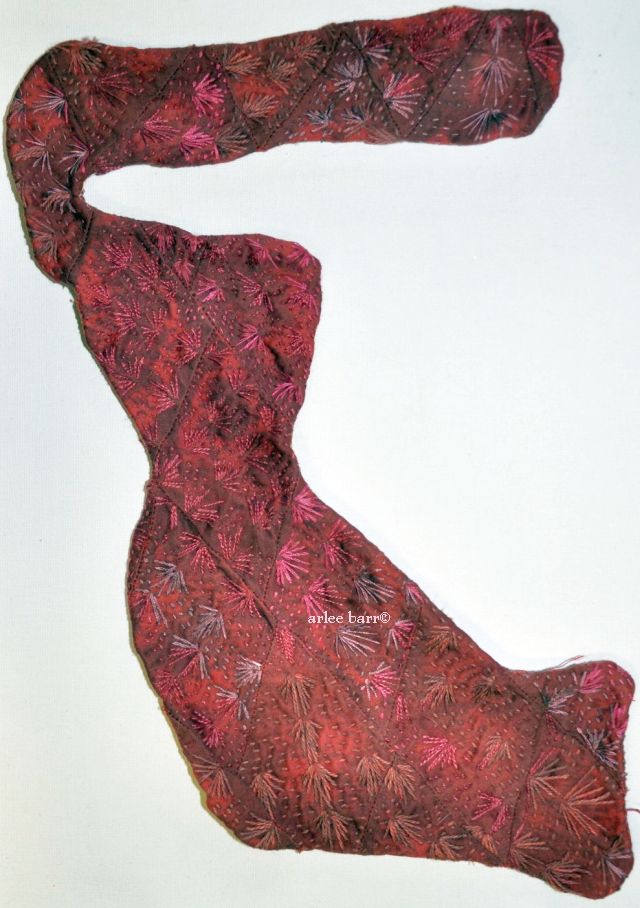
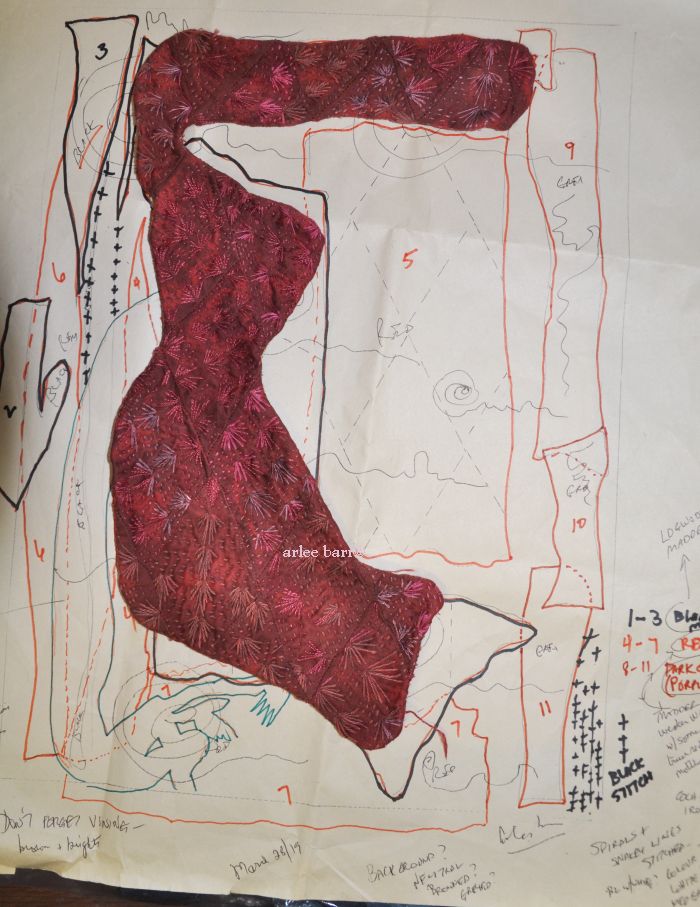
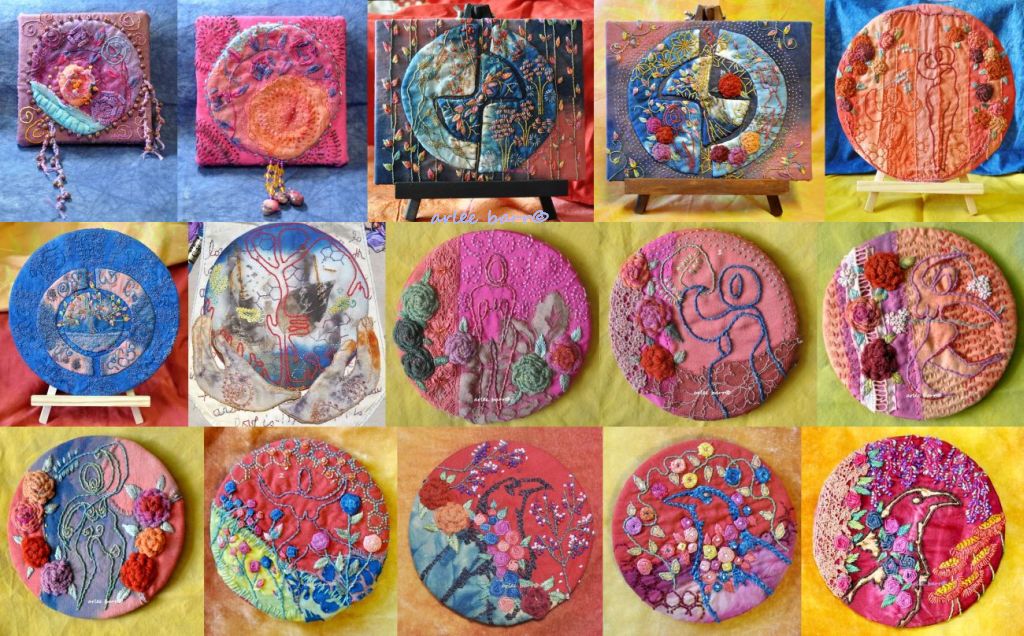
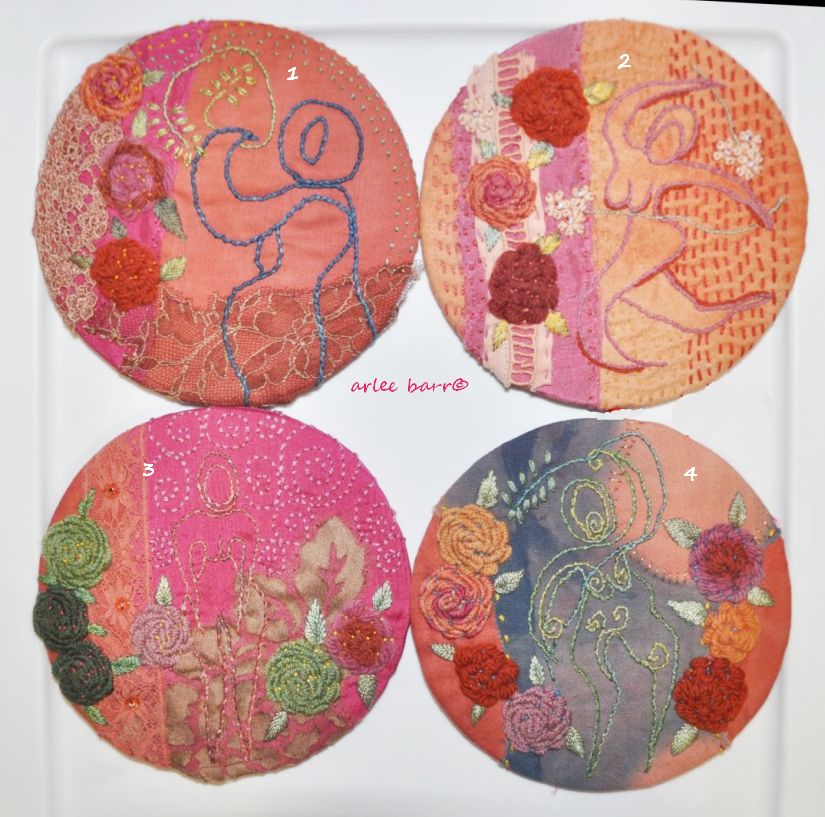
Posted in Collision: the work begins, embrilting, in progress, Natural Dyes, Naturally dyed threads

Crone progress

Still working on this, albeit very very slowly! Obviously the redder piece is going to need a bigger turn under (or trim) than i thought.

The “loosely based on a eucalyptus” leaf didn’t sing toΒ  me, until i added the copper mix beads:

Today should enable finishing the few remaining areas in the diamonds.

The rest of the week will see little studio or stitch corner work done: it’s Mother’s Day week at the ffffFlower Mines, and already i’m tired!

Posted in Collision: the work begins, embrilting, in progress, Naturally dyed threads

part 2, of many

Not going to show you the aborted and horrifying first attempt for the euc leaf on the second section πŸ™‚ I decided to keep that part simple instead and embroider on the section itself.

Just as well, because the text would be problematic to do over the edges of an applied piece. I’m not necessarily for taking the easy way out, but i think i made the right choice here. I’m also not sure i need to add the text at all. Or maybe i add it elsewhere on the piece as a whole. Or at the very least, part of it could become the name of the piece!

I did learn two new stitches though!

The walnut thread is the Pekinese stitch, something i’d love to do as a massed line/shape, and with my anchor stitches smaller. The paler colours (osage and sandalwood) are a woven cross stitch. That second one should be done with a heavier thread to show the effect, but i’m also convinced that it’s just easier to do it as a small weaving if you want more “legs” than the basic stitch has, rather than the awkwardness of trying to go through the same holes and lay threads flat enough to give the shape to it! The basic tute is on Sharon B’s Pintangle, though i went from my stitch bible, Jacqueline Enthoven’s “The Stitches of Creative Embroidery”. You can’t see the extra legs i did though because the silk thread is so fine. Nice lustre, but no definition!

The Pekinese stitch is good for the leaf, though in its new incarnation. Textural, and with the walnut thread and judicious use of paler earth tones, a good almost bas-relief translation of the original sketch. I’ll blend in the lighter threads so they are not so “liney” :), and finish filling in the diamonds as well. The whole when attached to the backing, won’t be as pointy either!


Posted in Collision: the work begins, embrilting, in progress, journal: lessons to learn, Natural Dyes, Poetry: text and textiles

Note to Self: check notes to self

It might not be set in stone, but there is/was/is a plan for this piece.

I looked through my “stitchionaries” (photo detail files of work previously done), my stitch bibles, online at new stitches, scribbled and sketched and thought, drooled on my thread choices and pondered and pondered. How am i going to treat this section, without it being too dense, but also to “fit” with the first section done?

DUH. What’s the piece that prompted this?

Obviously, it’s not going to be squared off like this quick cut and paste πŸ™‚

I think the leaf needs to be a separate piece applied on top of this section, and the embroidery done over and around it.

Posted in Collision: the work begins, embrilting, in progress, mordants and modifiers, Natural Dyes

building parts

Above, the first section completed. You can see the big difference on that worked section that the iron post modification made on the clear red of the original madder. (Post mod was done before stitching with quebracho rojo, cochineal and madder on silk and cotton threads.)

While i want the next section i’m working on to be a truer red, i want some nuance as well to riff the threads off. I tried post mods of soda ash, titanium oxolate and copper.

The soda ash dulled the red, the TO made it slightly orangey, and the copper, while darker and similar to the iron used before, is more what i wanted.

Though the lines are “obvious”, the threads chosen will soften the harder edges. Three shades of madder on cotton, silk and cotton, and a sandalwood on cotton should start me nicely.

I do have yet to decide which stitches i will use. I don’t want it as tightly massed as the finished section, but not really “open” and loose either.

Back to my Stitchionary for perusal and tests.

Posted in Collision: the work begins, embrilting, in progress, Natural Dyes, Naturally dyed threads

don’t set it in stone

I’m not sure who snuck into my studio the day i pieced this section and made it a different shape than “the plan”.Β  Doesn’t matter though, a plan is just a piece of paper, the work is what counts.

As i worked this, i also wondered if i had made myself extra work by piecing it first: does it matter that it’s many sections? Could i have done it as one piece which would have necessitated more marking, so maybe the same or more work to begin with anyways? From a distance, the diamonds don’t register as separate chunks. Would i feel as gratified if i had used one larger piece, that might have been closer to the original shape?

Does it make any difference in the end? If i had left the diamond shapes obvious around the edges, as i did this piece, maybe. Something to consider for future work. Should square pegs be forced into round holes? Reminds me of some ecoprint work that is COVERED in embroidery–well, now you can’t see the ecoprint, so wtf was the point of using it? Work with something, not against or despite it.

I could do this again, with smaller pieces and see if the rougher edges work. Mock up first, before i commit.

PS My quebracho rojo threads ran out, so i also used madder post modified with iron, dark cochineal, and a qr overdyed on bad lichen ( πŸ™‚ )

Posted in embrilting, journal: lessons to learn, Naturally dyed threads, Stitches

first stitches, mixing it up

I continue to study the embroidery stitches used on Central Asian textiles, but the other day while consulting Dr Google, i found this:

(Source, sold item on eBay) This is actually Swedish Huck “weaving”, a form of counted thread embroidery primarily used on household linens. Some of it looks very intricate, but is actually wonderful combinations of colour and simple line. (TIP: search huck weaving, rather than huck stitch.) Since the primary reason for looking at the CA embroideries was to learn new stitches, and new approaches, this still ties in nicely with expanding the repertoire.

I found it best to attempt it by first marking out some lines on my diamonds, because there are no threads visible for counting spaces, as there is on linen and other fabrics with this type of weave. You can see from this stitch diagram, that the lines and counting are spaced very evenly, but offset so there’s a “brick” patterning in that area.

Too, the long floats of the cotton thread used traditionally are a bit heavier, resulting in those lovely curves.

HA! because it isn’t a fabric that can have threads counted, oh my. Not quite as elegant as the above example, but i do do do like it, uneven-ness, angles and all. One can’t work perfectly, because only the Gawdz/Gawddessez are allowed perfection πŸ™‚ I want these sections to be less “obvious”, decorated, enhanced, so i chose instead to use a toning thread, quebracho rojo on the madder background, and will switch to deep cochineal when i run out of the qr. (Time for a big dye session again, running low on a few colours!) Even though it’s a silk, which you would think would give sinuous curves to the longer stitches/floats, it’s too fine to give that lay to the thread.

Thank goodness for washable markers, or this would be a horrendous mess πŸ™‚


Posted in embrilting, journal: lessons to learn, Moons, Natural Dyes

a year of dyeing moons

embroidered moons, natural dye, arlee barr, hand embroideryAll natural dyes, cloth and threads πŸ™‚ (Exception, first two moons top left.)

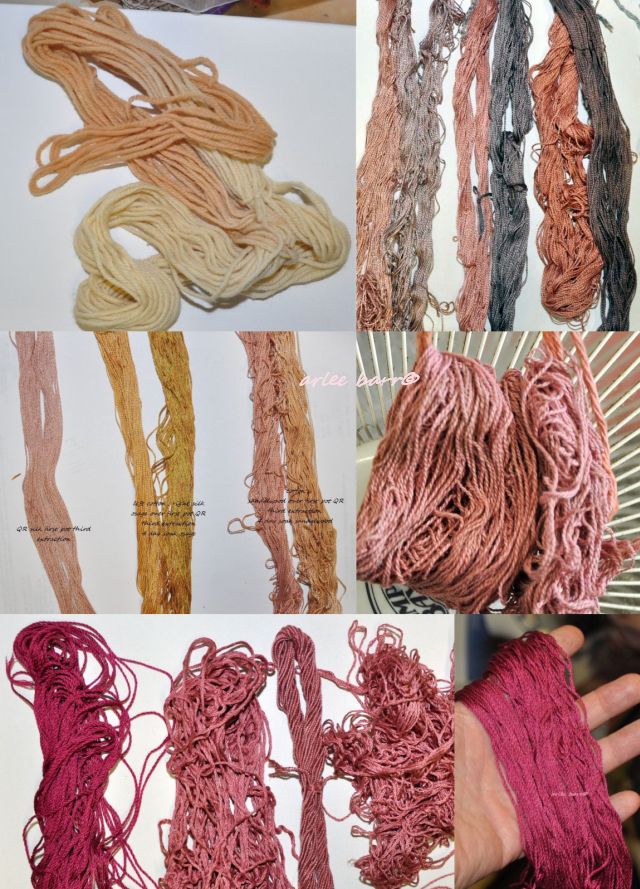
I think it was 2015 when i bemoaned that i would never have a good assortment of naturally dyed deep rich colours in my threads. HA. Though i had been using natural dyes for a while, something wasn’t working. I kept trying though, sometimes having success, sometimes horrendous fails. What was wrong? So, i diligently re-read the books, taking notes in minutiae, going through each step consciously, and WOWZERS, suddenly things worked. When in doubt, “read the instruction manual”! BUT, read the whole thing, read it in order, don’t just jump to the recipes. I highly recommend any of Jenny Dean’s books, Maiwa’s instructions, J. Liles, Domonique Cardon and the like.

I learned about scouring: just because something is white/new doesn’t mean it’s clean. Most fibres have dirt, dust, wax, pectin, chemicals, oils and who knows what from the initial gathering and processing, the manufacturing whether cloth or thread, the handling, transportation, storage and packaging. (Even PFD fabrics can be suspect.) I was shocked to see the colour of the water from the freshly bought, new, tightly packaged white thread, and how much particulate was in it after a good thrashing with soda ash and soap in boiling (or almost boiling, depending on the fibre type) water! Brown! Yellow!! Pink!!?????

I learned about mordanting, proper mordanting. According to fibre type, according to what was actually a mordant (NO vinegar, salt, soy products), according to correct WOF use, according to historical use and extant samples. (I chortle now when i see the so-called “vivid” colours on soy mordanted fabrics…………the uptake is uneven on most fibres, gives predominantly pale to medium shades and i wonder about the lightfastnessness, especially since no one seems to show actual tests!)

I learned about WOF, the correct amount of dye in ratio to the weight of the fibre being dyed. Dumping a tablespoon of dye and seeing a dark colour in the pot doesn’t mean that’s what you’re going to get on the fibre. And there was clear information being offered about the correct WOF for each type of dye, as they are not all the same.

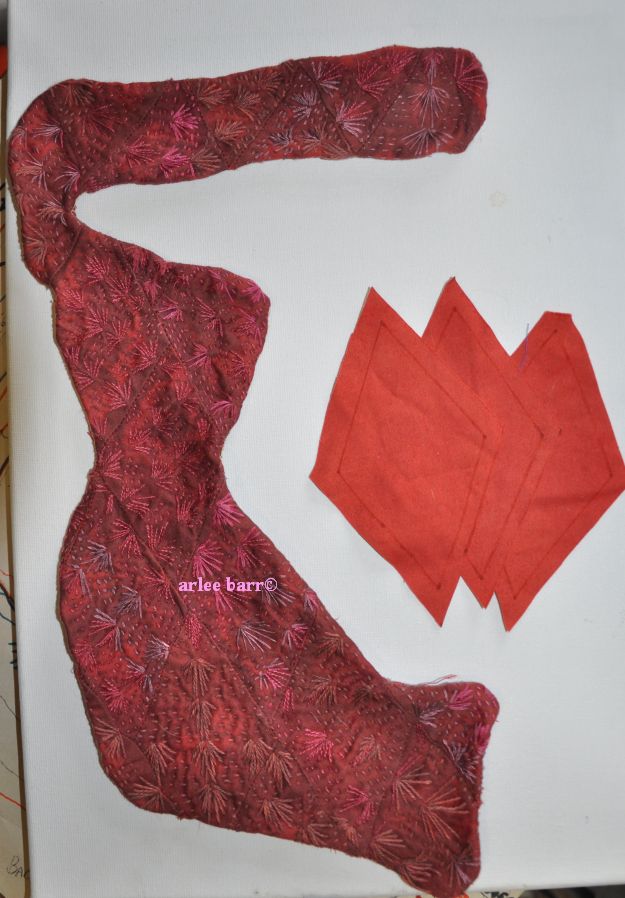
I learned what an actual natural dye is. The hollyhock blooms, the hibiscus all went into the compost heap, the avocados kept as a tannin only. Lovely colours, but fugitive, no matter how mordanted. Not wasting my efforts, resources, time. (Yes, there are still natural dyes that aren’t as light or wash fast, but most can be coaxed with proper mordanting and/or post modifying.)

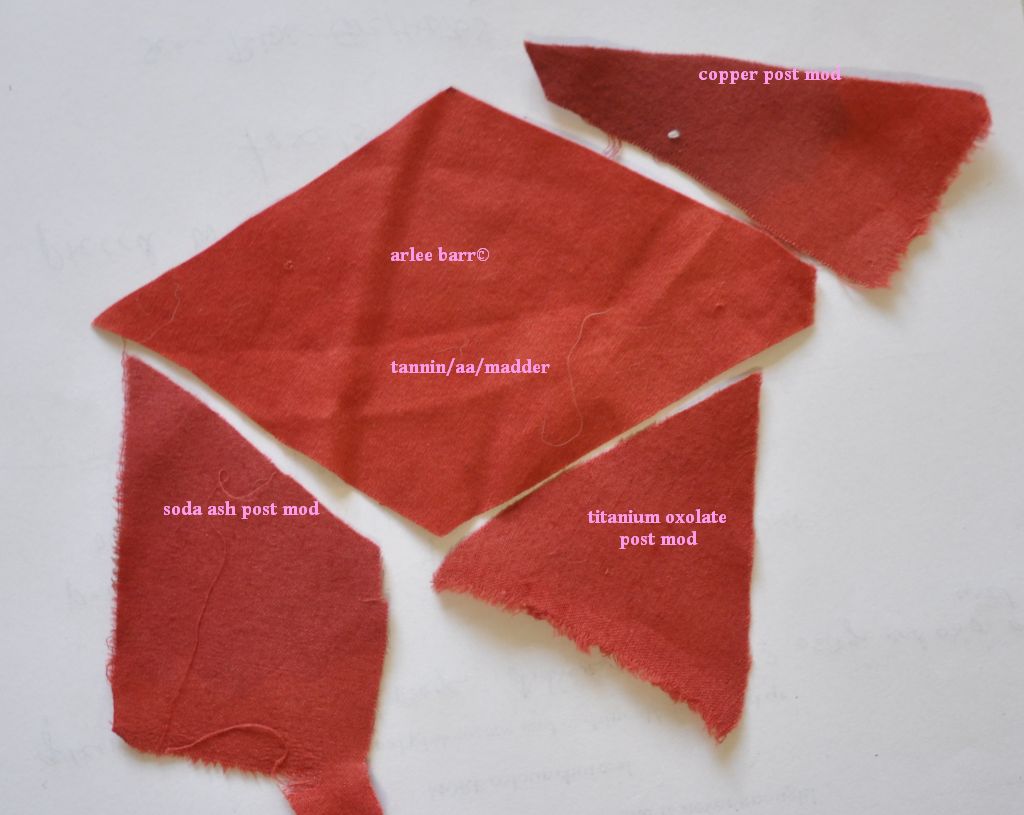
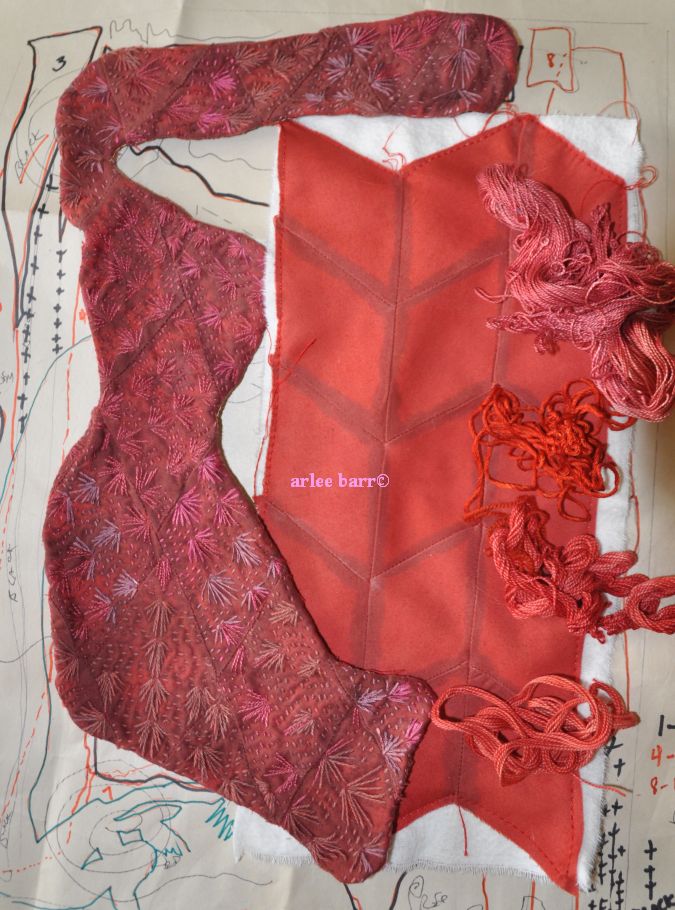
I learned about the effects of different mordants and pre or post modifying, about combining dyes and/or overdyeing, giving me an even more extensive array of colours and shades.

I learned about light and wash fastness. Oh boy, did i learn. The compost bin has thanked me on a few occasions.

The biggest thing i realized was TIME. With the exception of indigo, nothing comes out of my pots until it’s been in at least 8 hours, and often a day or two. It’s not instant gratification, nor a case of sitting and watching the pot boil, bemoaning “wasted” hours πŸ™‚ Like making homemade bread, most of the work is already done, and “waiting” can be either relaxing or productively spent elsewhere!

All of this has taught me patience this year, and while it’s still not a Perfect State for me, i’m getting there. I can turn away from the aggravating, the frustrating, those who “persist in their own stupidity” (as my Dear Mother says), and the willfully ignorant.


Mostly. I’m only human after all. Just trying to get better at it.


Posted in embrilting, journal: lessons to learn, Moons, Natural Dyes

using again

Stash, i’m using stash! Whadja think i meant? πŸ™‚

On Sunday when i was (re)organizing the work space, i had a brilliant thought. Why not USE some of the natural dyes? Seriously, wth am i making them for otherwise? Pretty piles are one thing, unused pretty piles are another πŸ™‚

I am stressed right now though, overly stressed actually, for reasons i won’t go into publicly, but keeping my hands and mind busy are a good antidote. That and long long wintry walks with the DogFaced Girl (Brown Dog), trying to gather my thoughts, and lock the doors against the Black Dog…………..

So. Small projects. Things i can finish if not in a day, maybe two or three. I have a resentment about making “things” that won’t see the light of day, are unappreciated, or that serve no purpose (gone are my days of filling the studio with tchotchkes based on magazine articles…), but these, these i like. Gifts, a thoughtful concentrated mark of time, hopeful colourful little bits that might mean something to someone.

When the light is better later today, i’ll rephotograph these, and list them in the shop (with an addended photo here too, so you can see them as they really are.). Through December, they’ll be on sale. Maybe they will cheer you, or a friend.


Posted in embrilting, FybreSpace the shop, in progress, Natural Dyes, Naturally dyed threads, quebracho rojo, Samara

OOOOyeah, and shop update

After auditioning fabrics for the areas behind the wings, i was inspired enough to finish the second one in two days. Admittedly smaller, but the idea of the velvet really got me going! The first one is finished and attached to its backing.

OMG i love this.

Because the velvet itself is so tactile, and the colouring from the osage and quebracho rojo so gorgeous, i decided to keep the stitch there as simple as possible. No point in hiding all that beauty! This velvet, though lush as silk velvet is, was easy enough to do without having to lay any stabilizer to stitch over, but the stitches still had to be solid enough not to sink in, so i stuck to a whipped backstitch–i love the line effect of this on any fabric.

And Borgles. Gotta have Borgles, one of the FrankenStitch mainstays. Picking one out to redo though, and have to add one more small one.

Thought i’d share my results too with the Quebracho Rojo: obviously not a winner for saturation on cotton (cellulose), but it sure is on silk (protein)!Β  The description on the website is a bit confusing, i think: “Quebracho is suitable for dyeing cellulose fibers and also performs well on silks and wool, and yields a lovely pinkish peach to brown rose color.” It’s obvious that the silk is INCREDIBLE, and look at those distinctly explicitly PINK shades! Wasn’t impressed with the uptake on the wool (first photo left top), but perhaps it was the pomegranate it had been premordanted with…. However, some post modifying, and some overdyeing with osage did give me a wonderful range of colours.

Do i know what i’m doing with natural dyes? I do, confidently, correctly from first step to last.

And i am willing to share the current silk velvet bounty πŸ™‚ Small packs in the shop! You’ll LOVE Making with it, stitching on it, fondling it!