Posted in journal: lessons to learn, natural dye research, Natural Dyes, Self Directed Workshops

ice ice no ice baby, snow no, not either

ZUT ALORS!!!!!!!!!!

Much frustration the other day: i’ve been experimenting with different techniques and dyes (because some dyes behave differently than others), wanting a little more dimension and visual interest in the naturally dyed cloth i offer in my online shop, and thing just weren’t doing what i wanted/expected them to do.

So i XXXXXX’d and BBBBBBC’d and even XXXBBCD’d and then turned off the damn stove and lights and went to pout.

At the end of the second day, i had these:


Above, lac on madder (silk habotai).

Below, lac on undyed cotton/silk blend (not sure which was the higher content, but i had premordanted for silk).

Below, lac on tansy (silk habotai), hard to see any tansy left!

Below, the truer colour.

Today, i will be testing the method on cotton and linen, expecting “harder” definition, and with other dyes than the lac, on previously dyed and undyed pieces. Hopefully, by the end of Monday, i will be able to share some in the shop!

And no, there is not even ONE bit of snow or ice used in these. That’s all 20 feet away in my wintery backyard, and can stay there. (Or rather disappear in our projected Chinook for this week 🙂 )

And yes, i am keeping the method to myself. It’s up to each dyer to develop and progress with their own techniques. Those who think that artists of any ilk are obligated to share the whole process are sadly mistaken. I see that every day in dye, botanical print, embroidery and mixed media groups with some getting quite huffy when you won’t lead them from step A to B to M to Finished. Learn the basics then find your style/practice/method! I remember asking a local ecoprinter how she had done XYZ and she sweetly smiled, winked and said “Every dyer has her secrets”. That may smack of elitism or Guild nastiness, but it isn’t, and it encouraged me to immerse myself, paying attention to the journey. And i’m still friends with that dyer 🙂

Found on one of my river walks with the DogFaced Girl.

There will be “Broken Kaleidoscope” packs in the shop on Sunday Feb 28th. Not exactly as shown, as the velvets will be different, and I’m not sure how many packs I’ll have, but here’s a heads up! EDIT: Listing open, and going fast!


Posted in a collusion of ideas, Collusion: sampling, Self Directed Workshops

a little R&D never hurts

Research and Development, or Refresh and Dive in 🙂 We all have favourite things we’ve done, but i know *i* sometimes forget i’ve done them!

Can you believe it’s almost 2020? How did that happen? I remember dating a school book 1963 and suddenly it’s 2020??? Anyways, i’m starting to plan for this next phase in the studio, even though i don’t believe the flip of a calendar page is magic. The last week of each year however does bring a certain amount of introspection and wondering what’s next. Here’s my first mashup inspiration, with lots of colour and texture and a few techniques i’d like to meld. There’s an old “scroll/shine book” behind everything, lots of blingy beads, gorgeous silk velvets, bits of embroidery in unfinished projects, old drawings and lots of hope. Who knows what will result?

Because we recently packed up, and then unpacked (which somehow has taken much longer than we thought it would…….”what a drag it is getting old”, as the Olde English Poets sang..), i’ve been reminded of some of these things.

Above, scroll/shrine book from 2009,

below ecoprint bags with machine lace from 2013. (These were a FB FybreSpace give away a few years ago, so not in my mashup 🙂 )

I’m out of practice too, so had to get in some “scribblin'” time with this old technique! EEEUUW, i need a LOT of practice again, won’t even show you what i did–Lalage has never been the best of machines, but but but!

The gorgeous silk velvets i’ve done the past year:

I still love hexes:

And the Suzani inspiration:

Looking at old drawings

I’ve promised myself this coming while too, to use more of my bead stash. There’s NO earthly reason why they can’t be combined with natural dyes and hand embroidery because after all, (while beads then were stone, bone, shell or metal) they were used historically as well. Sequins too!

Above, detail of work on Hoodoo Sky, 2009

Life has started going back to normal after our sudden big move, so it’s time to buckle down and get at it!

Posted in Alberta dye plants, natural dye research, Self Directed Workshops

local plant dye tests, Orach, part 2

Nope. Not even going to bother with light fastness tests with these!

Funny that after half an hour, a test pull had strong colours (strong being relative, as these are not exactly strong 🙂 ):

After 34 hours:

And rinsed:

HA.

I wanted do an iron dip to see if there was any tannin, always a useful thing to know,but could do that only on the silks, as the cotton and linen pieces of course had been premordanted with tannin.

Though these are still wet, i can tell you the tannin in this plant is negligible. There are much better local plants if i do want tannin, like oak!

The dyepot also started fermenting after 24 hours, probably due to the freshness and any alien life forms that live on these. Because there are no other elements in these but orach and water though, i’m going to dump in my garden. (Edit: My neighbour was intensely curious what i was watering my patio pots with after–ALL of the deep pink was still in the water!)

I’ve realized too that many posts about local plants are going to bore you, even if a Die Hard Dyer, so will limit those to the end results, multiple plants per post. I know a lot of you have wandered off in the last year anyways!

Posted in Alberta dye plants, garden dye plants, journal: lessons to learn, natural dye research, Self Directed Workshops

local plant dye tests, Orach, part 1

I’m taking several approaches here with foraged plants, so what works for me might not work for you, depending on where your plant material is growing, and it’s growth habits/requirements. There are many variables in natural dyeing, from that fact of plant biome, to water factors such as Ph, soft vs hard, city tap vs well, seasonal factors like heat, rain and soil composition and hell, just plain “luck of the draw” and magic. (Despite my crusty, abrupt, oft irked attitude, i DO love Nature and believe there IS magic afoot there.) There *are* actual credited dye plants in my area, but i’m also experimenting with either lesser known, or new to me possibilities.

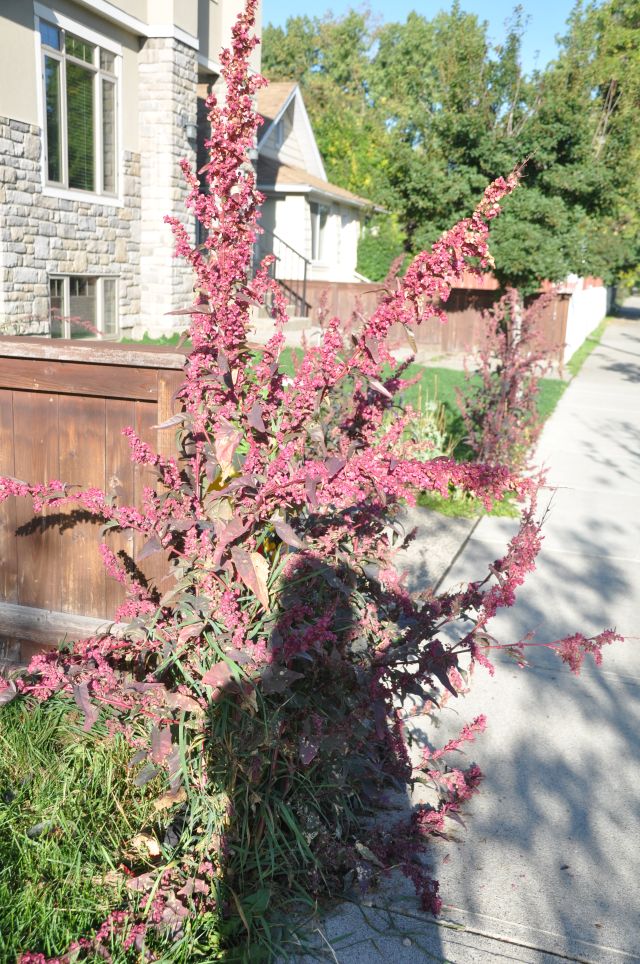
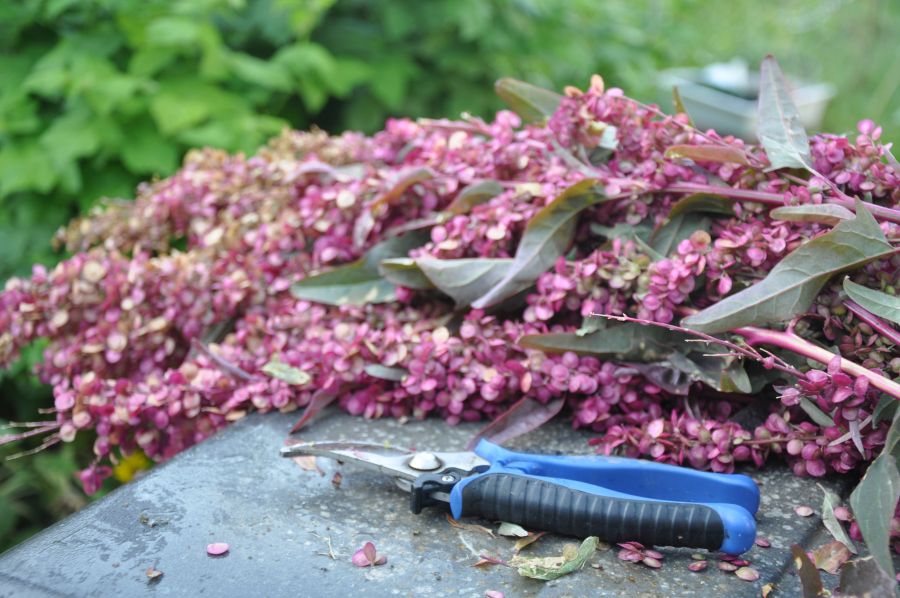
Red Orach, introduced to the neighbourhood as a garden “green” by my immediate neighbour, is prolifically self seeding and will grow ANYWHERE, as i’ve found it everywhere from our lush back meadow, to the neighbour’s sterile little golf green lawn, the rough berm across the road, and down on the riverbank. (Our soil here is river sediment/clay based.) I initially thought it was in the Rumex family, but it is in fact Atriplex hortensis, part of the Amaranthaceae classification. And yes, i AM drawn to it by the very fact too that it is red–i *know* plants like this are full of anthocyanins, a fugitive colourant that neither lasts in light (or dark, and why would you keep beet/bean/berry/red cabbage stained cloth/es in the dark if the dye is that bad????) or through washing. But, maybe i’ll get a different yellow than the other mostly yellow colouring plants i intend to try? BWAHAHAHA. As i’ve said before, most “local” plants give a range of yellow, yellow, yellow or yellow……. But i *might* get pink, peach, coral with the right post mordant/modifier treatments, on different fibres. (This worked well, back in the day, with rhubarb root.)


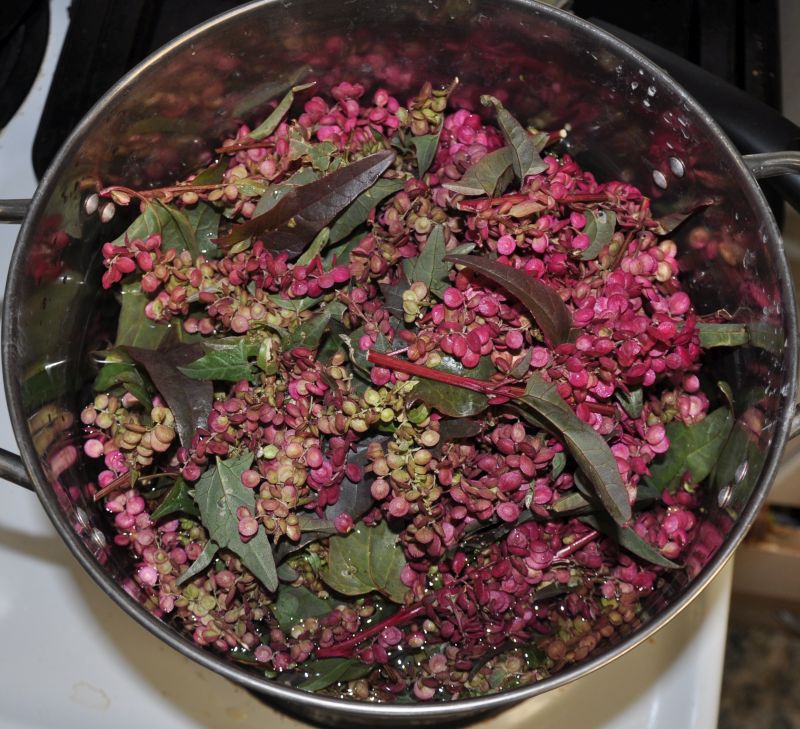
I thought i’d do the first test with our filtered water, as our tap water is very very hard, and loaded with iron as well, and truthfully there are few dyes that do well in hard water. I’m also simmering, not boiling, as most dyes shouldn’t go above 180 degrees F/80 degrees C.  A total of maybe 600grams?

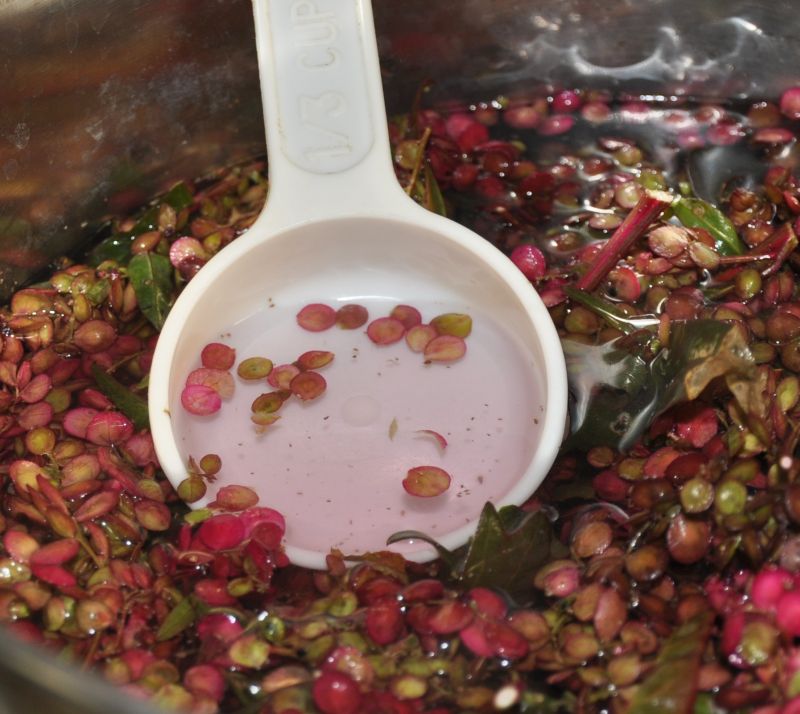
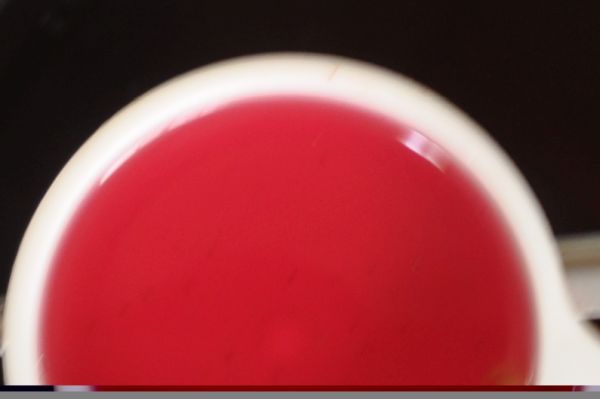
After 20 minutes, the water did start turning pink, no surprise actually, because this plant is used also for food colouring, and the neighbours noted their kids wouldn’t eat an omelette after the addition of the leaves turned the eggs pink…… 🙂 Reminds me of when i was a kid and the family was camping. Late one night, supper, only food left eggs and strawberries. Dad threw them together, result pink puke that no one would touch. Ah, memories.
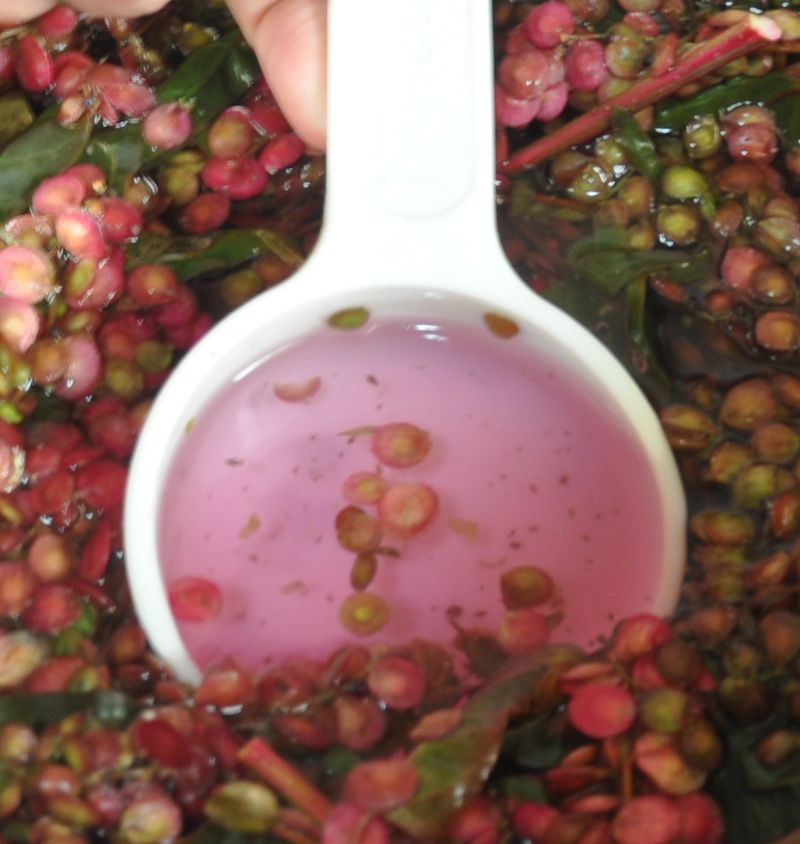
At 40 minutes:

Simmered for an hour, then cooled for another hour, i then strained all the plant material out (and the bugs…..i did rinse everything first, but there were Klingons apparently.) Because these are an edible, they will go right into the compost bin in the back40.

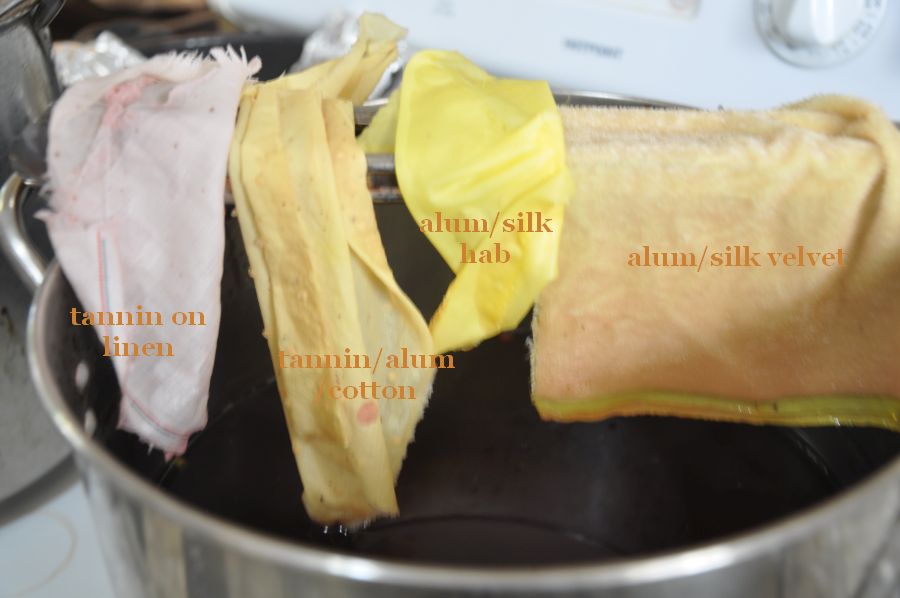
I  leave the whole bath letting it cool on the burner, my usual method. In it, i threw premordanted according to fibre type pieces of silk velvet, silk habotai, cotton swiss dot and a tannined, but not yet alum treated linen. (I can post mordant that one.) There is a BIG caveat here: the colour you see in a dye pot, is not always what you get on the fibre! (That’s why too many artily staged IG photos are just plain fraudulent.) I will leave all of these chunks in the pot for 2 days, occasionally raising the temp to prevent mold and alien lifeforms, as normally this is how i dye, leaving the fibres in anywhere from 8-36 hours, depending on how busy i am or if i forget!). Too, protein and cellulose fibres should actually be dyed separately as protein is greedier and grabs more of the dye, so cellulose results may be weaker. Whatever. It’s a test.

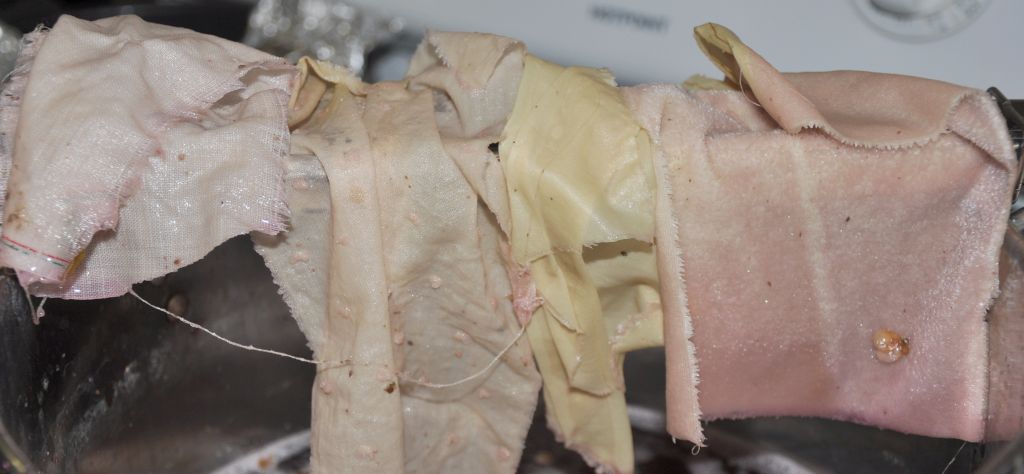
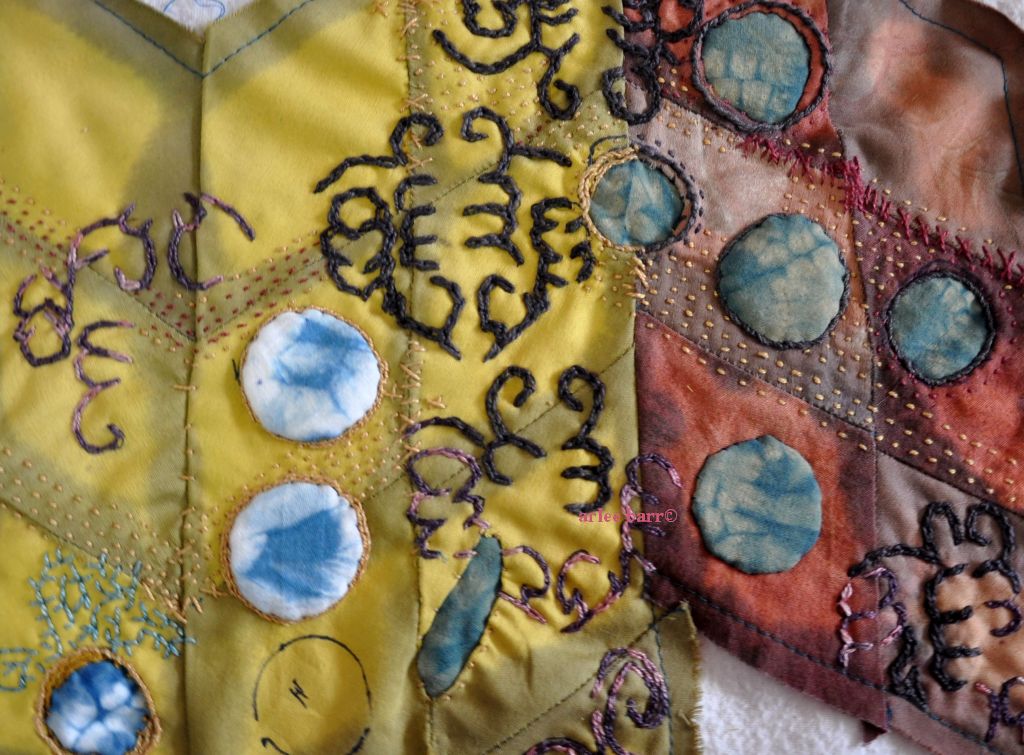
This is half an hour in the pot, again not very indicative of what the end results will be, but interesting in terms of chemistry, just a pull to see if anything is happening. These are unsqueezed, unrinsed, so keep that in mind!

On the weekend, i will do some post mods and mords, then start lightfast tests. I don’t expect miracles, but the hoofies are crossed anyways, in the spirit of admiring Nature’s magic.

I am drying another 600 grams or so. If the above test doesn’t really work as a dye, well, the dried may be added to something else as a weak tannin, or slightly acid something or other. Or tossed 🙂

EDIT: AS you will see from my next post, Orach is NOT a good textile grade dye!


Posted in a collusion of ideas, Collision: the work begins, Self Directed Workshops

“suz, suz, suz, suzani”

To paraphrase Phil Collins……

Progress is slow on this, not because it’s difficult, overwhelming or a slog i feel obligated to get through, but because Life is happening. (Not in a bad way, just a busy way.)

Technically, a “Suzani is a type of embroidered and decorative tribal textile made in Tajikistan, Uzbekistan, Kazakhstan and other Central Asian countries. Suzani is from the Persian سوزن Suzan which means needle. The art of making such textiles in Iran is called سوزن‌دوزی Suzandozi (needlework).”

Though there are elements of Swati and Uzbeki in this, i’m also going for some Sindhi, Kutch–and Me 🙂 For easy reference, by no means comprehensive, but still useful, check out the Wikipedia page “Embroidery of India”, for an overview. I have no desire to emulate any of these exactly: instead i am doing exercises to broaden my use of stitch, and to learn either new stitches, or new ways to use variations of them, an in depth self directed workshop.

While i stitch, i think. I have ideas already for other work, that is less derivative/evocative/reflective. While i know that contemporary work in some of these regions is now done with synthetic dyed threads and fabrics, it’s the naturals again that are making the choices and setting the direction for me. I wouldn’t have tried this if i had dependence still on commercially dyed threads: it just wouldn’t have occurred to me to try this. Research and study of natural dyes leads to the history of them, the use, the end product of thread or cloth, the purpose of these materials geographically and as an art/craft form— it’s a never ending rabbit hole!

I managed to find TWO books from our local library  that have been helpful. “Embroidery from India and Pakistan” by Sheila Paine is somewhat of a catalogue of items from the British Museum, with gorgeous photos of clothing and household items, some with detail shots, and very basic descriptors of the region, stitch type and aesthetic notes, but no “how to’s”. I *did* learn however that satin stitch as we know it, is not actually used a lot, as it is wasteful of thread. If you think of how much of it is behind the work (on the reverse) as well, you can appreciate that when resources are few and probably quite expensive, you want to use as much as possible on the front. A lot of what looks like satin stitch is actually a surface stitch, akin to darning, but without the crosshatching weaving of another thread. I fell in love with this one, a detail from a Sindhi dress:

I left this as a deliberately large photo, so you can see the details more clearly. You can see though that with the surface stitching(the rounds with “radiating stitch” and the pink and lavender shapes down the sidebars), wear and breakage happens, i would think easily, and quickly.

The second book is “The Techniques of Indian Embroidery” by Anne Morrell. Again, wonderful photos in colour and with details of items, and with illustrative diagrams of the stitches used. The only problem i had was the constant flipping of pages to match “figure 36” stitch diagram with plate 21 to see the stitch in “action”. I’m curious too why the artisans  would work with the reverse side towards them, as stated in this book, as it seems very counter-intuitive.

This is also the surface stitch i mentioned, used in this Phulkari piece:

What also blows me away, and a Thing i do not aspire to, is the neatness and regularity of the backs of these! Some are two or three layers of cloth to eke out  what is available, but many are one single layer.